
Settings
Minigame settings are super easy to configure and allow for quite a lot of control over the behaviour of your minigame.
In addition to the built-in default settings, you are able to implement your own settings using this system, all the settings are accessible and configurable in-game through a gui.
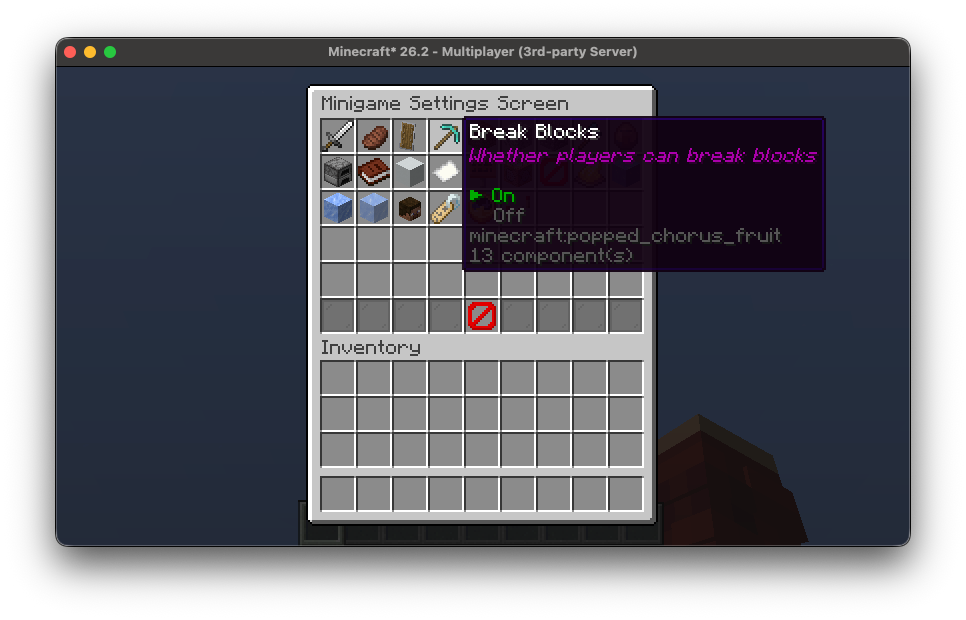
Built-In Settings
All the built-in settings are defined in the MinigameSettings class, these are accessible through Minigame#settings, we'll discuss some of them and what they do.
Let's say we're creating a multi-player parkour minigame, it's likely we don't want players to be able to punch each other, to do this we can simply disable PvP:
minigame.settings.canPvp.set(false)We'd also want the players to stay in full hunger:
minigame.settings.canGetHungry.set(false)And we don't want the player to modify our parkour maps:
minigame.settings.canBreakBlocks.set(false)
minigame.settings.canPlaceBlocks.set(false)
There are also some more admin-related settings, for example:
minigame.settings.isChatMuted.set(true)This will mute chat and prevent players from sending messages.
There are also some settings to aid with tick-freezing the minigame, for example, if you want your minigame to freeze all ticking when the minigame is paused:
minigame.settings.tickFreezeOnPause.set(true)Or even if you just want to freeze all entities (including players) at a given moment:
minigame.settings.tickFreezeEntities.set(true)These settings work on a level-wide basis, depending on the worlds you registered for your minigame, it doesn't affect other minigames or worlds that aren't part of your minigame. For more information, go back to the World Section.
There are more settings for you to explore, be sure to take a look at the class to see what is available!
Custom Settings
To create custom settings for your minigame, you first must extend the MinigameSettings class.
class ExampleSettings(minigame: Minigame): MinigameSettings(minigame) {

}
And then override the settings field in your minigame to use it:
class ExampleMinigame(
    server: MinecraftServer,
    uuid: UUID
): Minigame(server, uuid, ID, ExamplePhase.entries) {
    override val settings: ExampleSettings = ExampleSettings(this)

    // ...
}
Setting Types
The underlying class for all settings is GameSetting<T>, this is essentially just a wrapper for some value with any type T. The type of the value is described by a GameSettingType<T>, which is what knows how to serialize it, and there are a couple built-in types that this supports:
GameSettingType.BOOL
GameSettingType.INT32
GameSettingType.INT64
GameSettingType.FLOAT32
GameSettingType.FLOAT64
GameSettingType.STRING
GameSettingType.IDENTIFIER
GameSettingType.TIME
GameSettingType.enumeration<E>()
GameSettingType.optionalEnumeration<E>()
These will likely be all you need, however, creating your own type is super simple:
// Use Codec<T> for your type, in this example using a Vec3
val vec3SettingType = GameSettingType(Vec3.CODEC)
Building a Custom Setting
We build GameSetting<T>s with a GameSettingBuilder<T>, and each of the built-in types has a matching builder function:
GameSettingBuilder.bool()
GameSettingBuilder.int32()
GameSettingBuilder.int64()
GameSettingBuilder.float32()
GameSettingBuilder.float64()
GameSettingBuilder.string()
GameSettingBuilder.id()
GameSettingBuilder.time()
GameSettingBuilder.enumeration<E>()
GameSettingBuilder.optionalEnumeration<E>()
For a custom type you can construct the builder directly with your GameSettingType:
val builder = GameSettingBuilder(vec3SettingType)Now to use the builder, the first thing we want to do is give the setting a name, and a default value:
val setting: GameSetting<Int> = GameSettingBuilder.int32 {
    name = "my_setting"
    value = 100
}
This is the minimum you need to create a GameSetting, however it is only displayed in the gui if you give it a display item, whose name labels the setting:
val setting: GameSetting<Int> = GameSettingBuilder.int32 {
    name = "test_setting"
    value = 50
    display = Items.REPEATER.named("Test Int")
}
It's also likely you want to add some options - these are the values that an admin can pick between, and each one has a name which labels the value in the gui. Clicking the setting cycles forwards through the options, and right-clicking cycles backwards:
val setting: GameSetting<Int> = GameSettingBuilder.int32 {
    // ...
    option("first_option", Component.literal("Low"), 0)
    option("second_option", Component.literal("Medium"), 50)
    option("third_option", Component.literal("High"), 100)
}
In-game your setting would look like this: 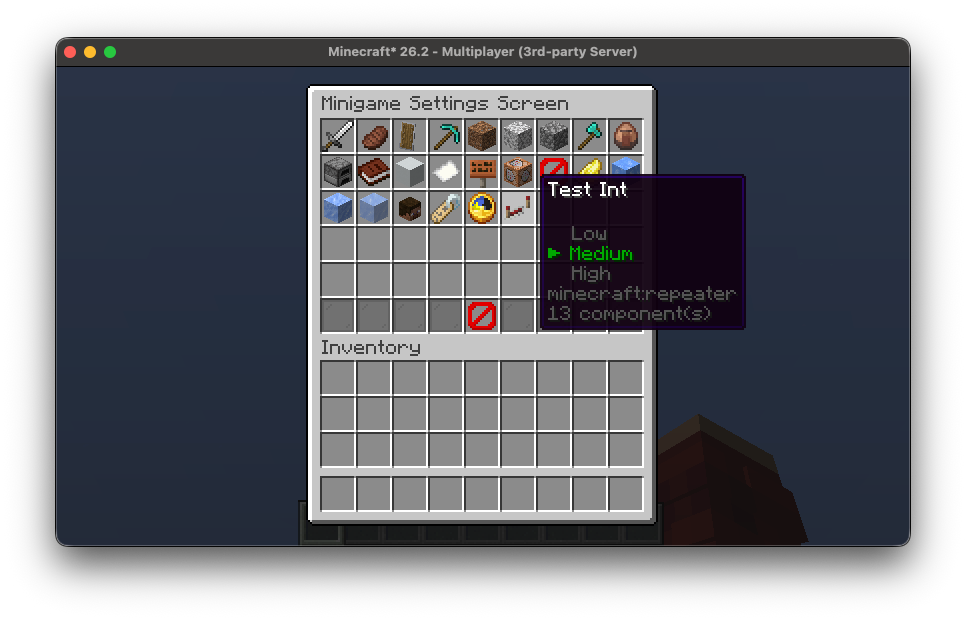
A setting isn't restricted to its options, they're just the values that can be picked in the gui; the value can always be set to anything in code or with the /minigame settings command.
We can also add listeners to our setting to get notified when the setting is changed:
val setting: GameSetting<Int> = GameSettingBuilder.int32 {
    // ...
    onChange { setting: GameSetting<Int>, previous: Int, value: Int ->
        println("My Setting was set to $value")
    }
}
There is a similar onApply, which differs in that it is also called when the minigame initializes, including after a minigame has been loaded back from disk. This is what you want if a setting has to keep something else in sync with its value, rather than just reacting to a change:
val setting: GameSetting<Int> = GameSettingBuilder.int32 {
    // ...
    onApply { setting: GameSetting<Int>, value: Int ->
        println("My Setting is $value")
    }
}
And finally we can add setting overrides, this is for the case of player-specific settings, and is mostly designed to add overrides for administrators. For example, the isChatMuted setting has an override that will let any minigame admins bypass the mute.
val setting: GameSetting<Int> = GameSettingBuilder.int32 {
    // ...

    // If the player this setting is being applied
    // to is an admin, the value will be 900
    override(isAdminOverride(900))

    // This can be any function
    override { player: ServerPlayer ->
        player.experienceLevel
    }
}
An override returns null if it doesn't apply to that player, in which case the setting's own value is used. To read a setting with the overrides applied, pass the player when getting the value:
val setting: GameSetting<Int> = // ...
val player: ServerPlayer = // ...

// The setting's value, ignoring any overrides
val value: Int = setting.get()
// The setting's value for this specific player
val overridden: Int = setting.get(player)
Registering Custom Settings
Now inside our class we can register our first setting, we can do this by using the register method. This takes in a GameSetting<T> and returns it, so we can assign it in one go:
class ExampleSettings(minigame: Minigame): MinigameSettings(minigame) {
    val myTestSetting: GameSetting<Int> = this.register(GameSettingBuilder.int32 {
        name = "test_setting"
        value = 50
        display = Items.REPEATER.named("Test Int")

        option("first_option", Component.literal("Low"), 0)
        option("second_option", Component.literal("Medium"), 50)
        option("third_option", Component.literal("High"), 100)

        onChange { setting: GameSetting<Int>, previous: Int, value: Int ->
            println("My Setting was set to $value")
        }

        override { player: ServerPlayer ->
            player.experienceLevel
        }
    })
}
This will register the setting for the minigame and will add it to the list to be displayed in the gui.
GameSetting<T> can also be delegated, this means alternatively we could write our setting like so:
class ExampleSettings(minigame: Minigame): MinigameSettings(minigame) {
    var myTestSetting: Int by this.register(GameSettingBuilder.int32 {
        // ...
    })
}
This means we can directly get and set the value of the setting:
val settings: ExampleSettings = // ...
println("The value of My Custom Setting is: ${settings.myCustomSetting}")
settings.myCustomSetting = 99
Default Options
Some setting types have an obvious set of options; a GameSetting<Boolean> can only have two, one for true, and one for false, and an enum setting has one per constant. Instead of adding options for these manually, we can just use defaultOptions:
class ExampleSettings(minigame: Minigame): MinigameSettings(minigame) {
    val myCustomSetting by this.register(GameSettingBuilder.bool {
        // ...
        defaultOptions()
    })

    val myEnumSetting by this.register(GameSettingBuilder.enumeration<ExampleEnum> {
        // ...
        defaultOptions()
    })
}