Bossbars
Bossbars are great for displaying ui at the top of the player's screen, they're useful as you're able to display multiple bossbars at a time.
Static Bossbars
The most simple bossbar we can create would be static, that is everything about the bossbar is constant. We can create one of these by constructing a StaticBossbar:
val bossbar = StaticBossbar(
    title = Component.literal("My Bossbar"),
    progress = 0.5F,
    color = BossEvent.BossBarColor.BLUE,
    overlay = BossEvent.BossBarOverlay.PROGRESS,
    dark = false,
    music = false,
    fog = false
)

val player = // ...
bossbar.addPlayer(player)
This will result in the following bossbar: 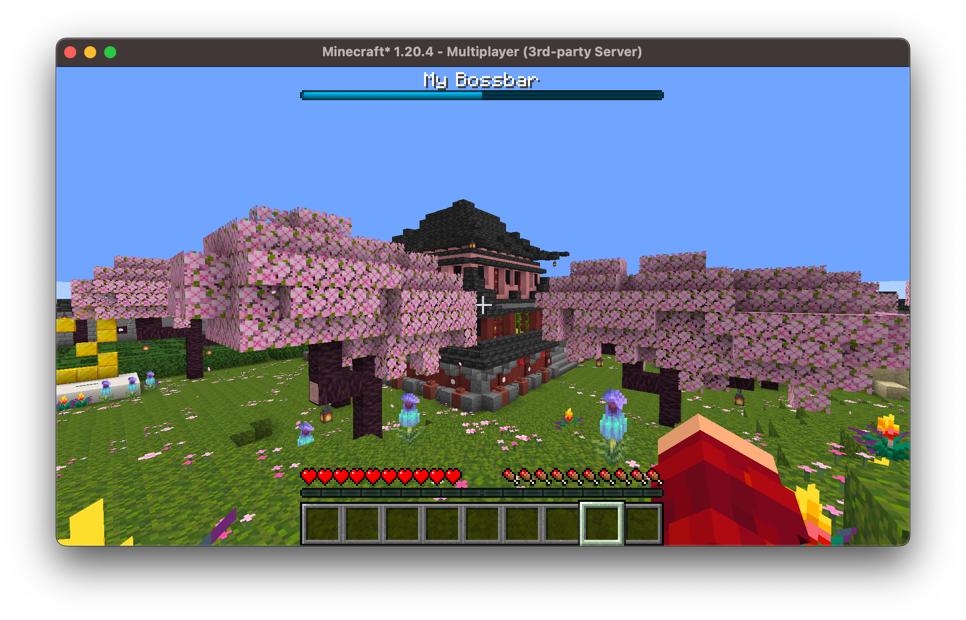
Dynamic Bossbars
We have two ways of creating dynamic bossbars, the first is utilizing PlayerSpecificElements. We can construct a SuppliedBossBar:
val bossbar = SuppliedBossbar()
bossbar.setTitle { player -> player.displayName }
// Progresses throughout a minecraft day
bossbar.setProgress(UniversalElement { server ->
    (server.tickCount % 24_000) / 24_000.0F
}.cached())
// Set the color and overlay of the bossbar
bossbar.setStyle(
    LevelSpecificElement { level ->
        when (level.dimension()) {
            Level.NETHER -> BossEvent.BossBarColor.RED
            Level.END -> BossEvent.BossBarColor.PURPLE
            else -> BossEvent.BossBarColor.BLUE
        }
    },
    BossbarOverlayElements.progress()
)
This results in the following bossbar: 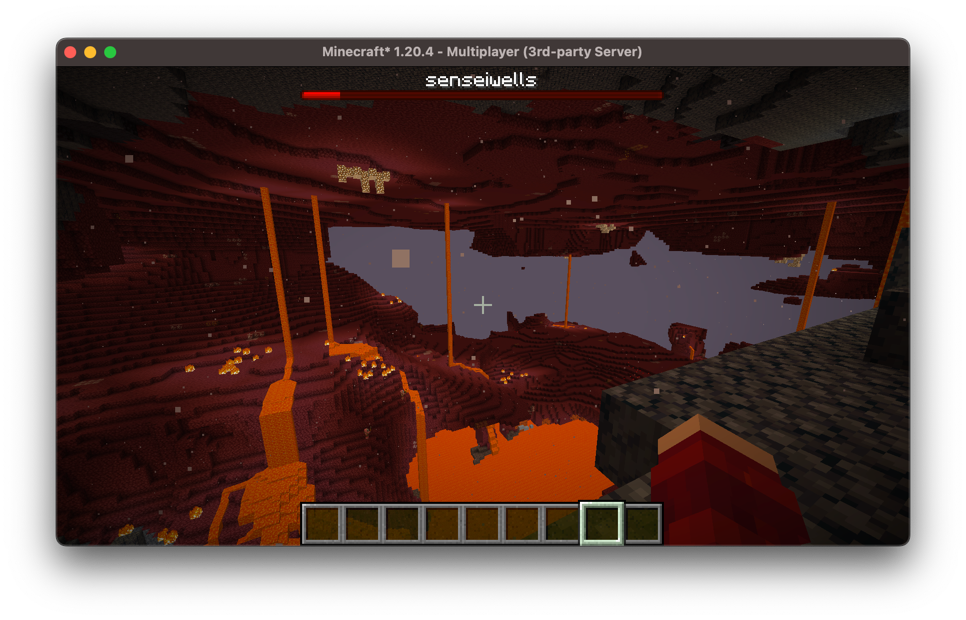
We can also directly extend the CustomBossbar class and implement our own methods, if you'd prefer:
class MyCustomBossbar: CustomBossbar() {
    override fun getTitle(player: ServerPlayer): Component {
        TODO("Not yet implemented")
    }

    override fun getColor(player: ServerPlayer): BossEvent.BossBarColor {
        return super.getColor(player)
    }

    override fun getOverlay(player: ServerPlayer): BossEvent.BossBarOverlay {
        return super.getOverlay(player)
    }

    override fun getProgress(player: ServerPlayer): Float {
        return super.getProgress(player)
    }

    override fun hasFog(player: ServerPlayer): Boolean {
        return super.hasFog(player)
    }

    override fun hasMusic(player: ServerPlayer): Boolean {
        return super.hasMusic(player)
    }

    override fun isDark(player: ServerPlayer): Boolean {
        return super.isDark(player)
    }
}
Timer Bossbars
Bossbars are great for displaying timers due to their nature of having a progress bar. Arcade provides a TimerBossbar class which allows you to create such timers and display them.
Similar to a CustomBossbar you must extend it and create your own implementation for the bossbar methods:
class MyCustomTimerBossbar: TimerBossbar() {
    override fun getTitle(player: ServerPlayer): Component {
        TODO("Not yet implemented")
    }

    // ...
}
Typically, for these bossbars you do not want to override the getProgress method as this is calculated for you based on the remaining time. However, if you want your bossbar to be smaller, you may want to scale the progress.
class MyCustomTimerBossbar: TimerBossBar() {
    // ...

    override fun getProgress(player: ServerPlayer): Float {
        return MathUtils.centeredScale(this.getProgress(), 0.75F)
    }

    // ...
}
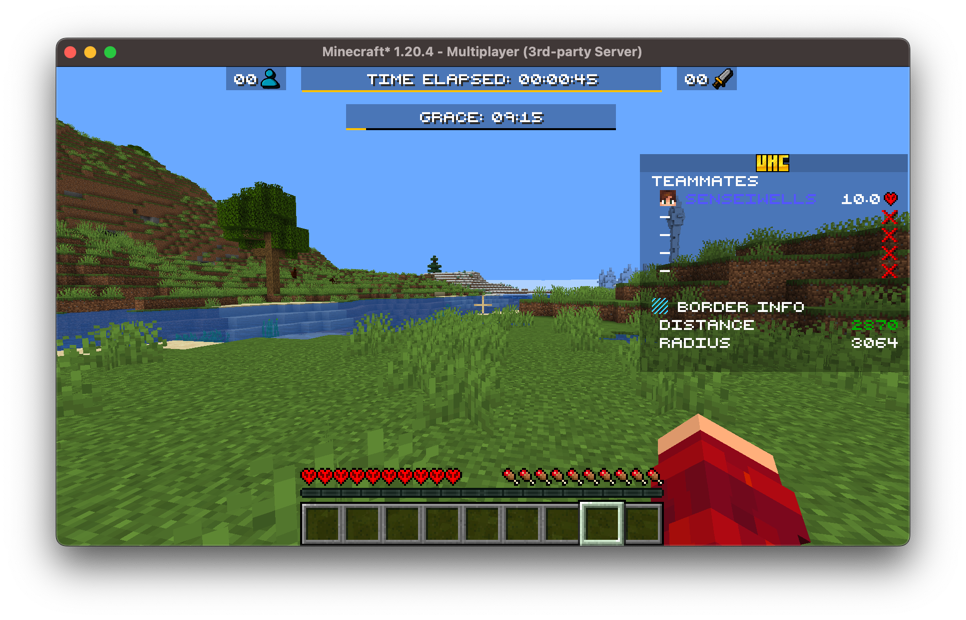
For example, like the grace bossbar in the image below, to achieve this effect, you can create a resource pack and change one of the bossbar color textures to be shorter.
Once you have your bossbar implemented, we can now make use of the timing features.
val bossbar: TimerBossBar = MyCustomTimerBossbar()
// Resets the timer and sets the duration to 10-minutes
bossbar.setDuration(10.Minutes)

// Doesn't reset the timer, instead sets it to finish in 5-minutes from now
bossbar.setRemainingDuration(5.Minutes)

// Unset the timer
bossbar.removeDuration()

bossbar.setDuration(1.Minutes)
bossbar.then {
    println("This task will run after the timer finishes!")
}
These timing features are great for displaying when phases will end in minigames, like in the above example to show when the grace period ends.
NOTE
In order for the TimerBossbar to countdown you must call the tick on it. If you've added this bossbar to a minigame, this will be handled for you.